 IDEAXECUTION TECHNOLOGIES
IDEAXECUTION TECHNOLOGIES
IDEAXECUTION TECHNOLOGIES
In today’s global marketplace, creating apps that can reach users worldwide isn’t just a luxury—it’s a necessity. Internationalization (i18n) and Localization (l10n) are crucial steps in making your React Native app accessible to users across different languages and regions. This guide will walk you through implementing these features effectively in your React Native applications.
Understanding i18n and l10n
What is Internationalization (i18n)?
Internationalization is the process of designing and preparing your app to be adapted to different languages and regions. This involves:
What is Localization (l10n)?
Localization is the actual process of adapting your app for a specific locale or region, including:
Why it Matters
In today’s globalized world, mobile applications are used by a diverse audience across different countries and cultures. Internationalization and localization ensure that apps provide a seamless and personalized user experience, regardless of the user’s language or region. Here are the key reasons why it is essential:
Setting Up i18n in React Native
1. Installing Required Dependencies
To implement internationalization in React Native, you’ll need to install the following packages:
Command : npm install react-native-localize i18next react-i18next
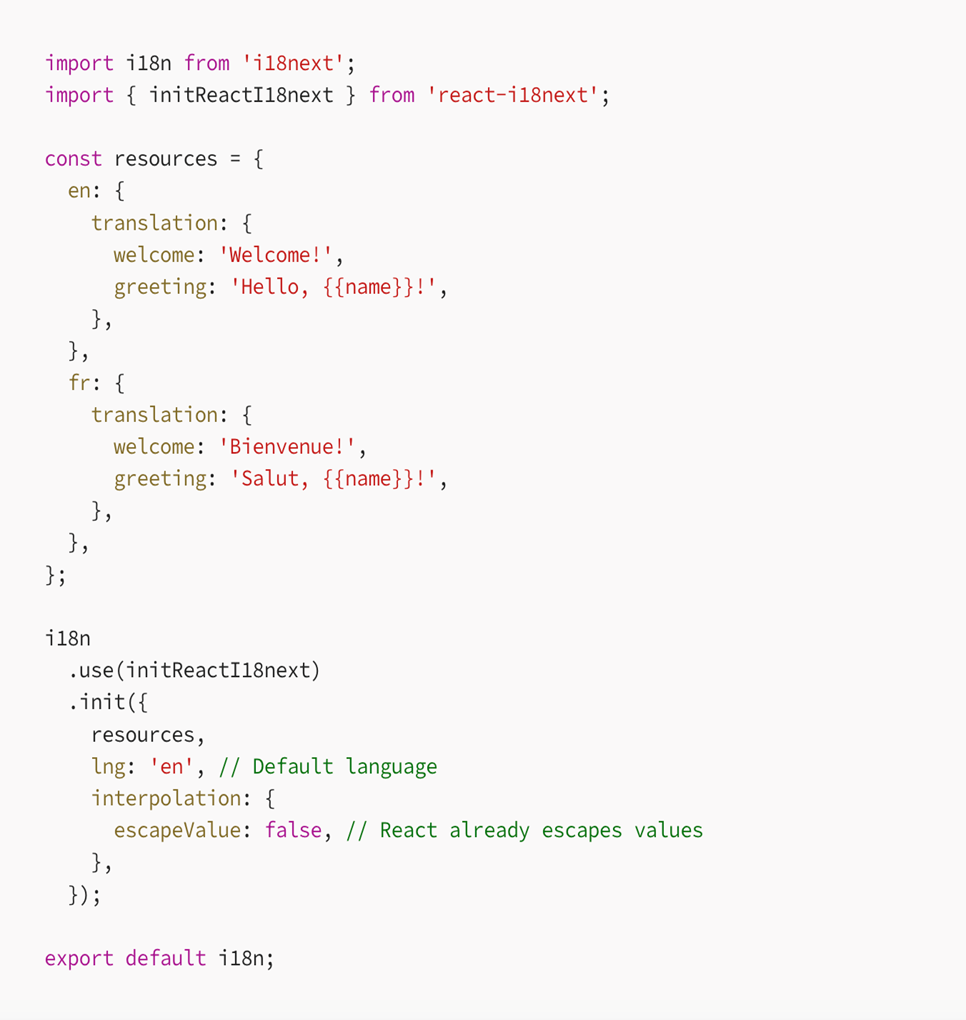
2. Configure i18n
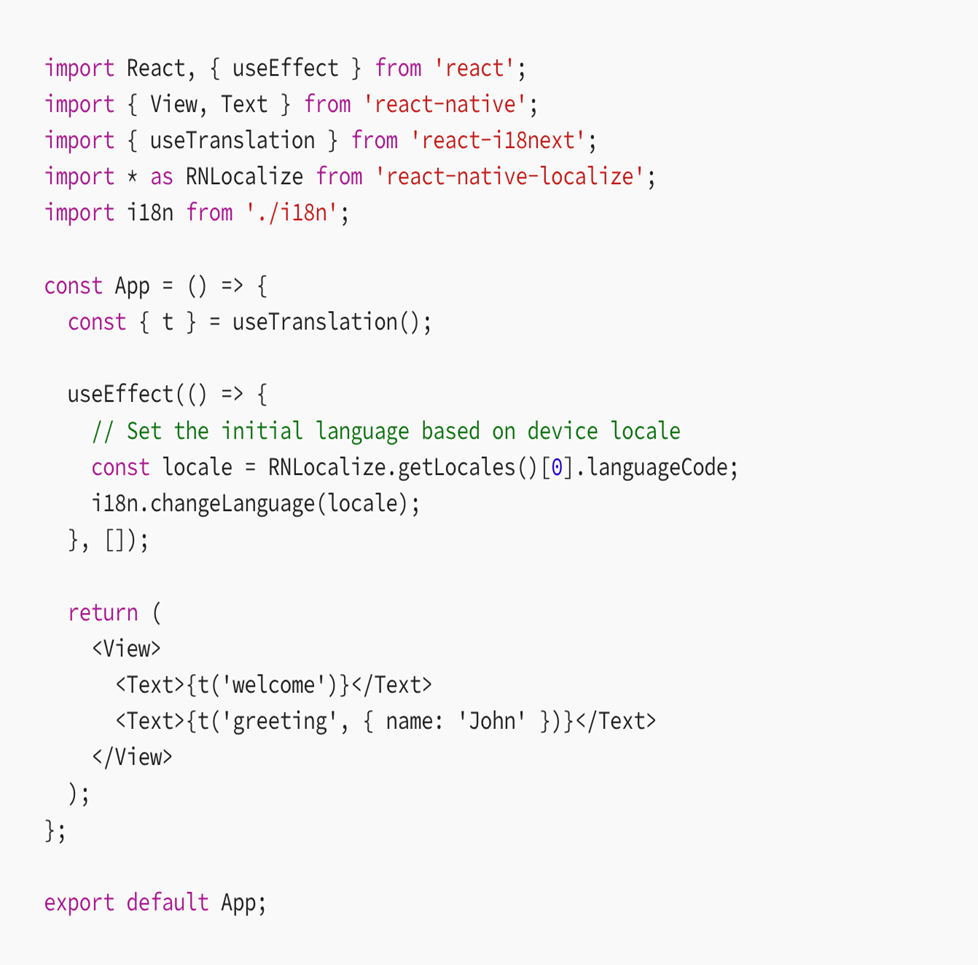
3. Configure component that utilizes both i18n and localization
Native-Side Implementation Requirements
Why Native Implementation is Critical
While React Native handles most of our UI localization through JavaScript, there are several scenarios where native-side implementation becomes essential:
System-Generated Messages
These messages come directly from the native iOS/Android systems and need proper localization configuration to display in the user’s language.
iOS Native Setup
1. Add supported languages to your Info.plist

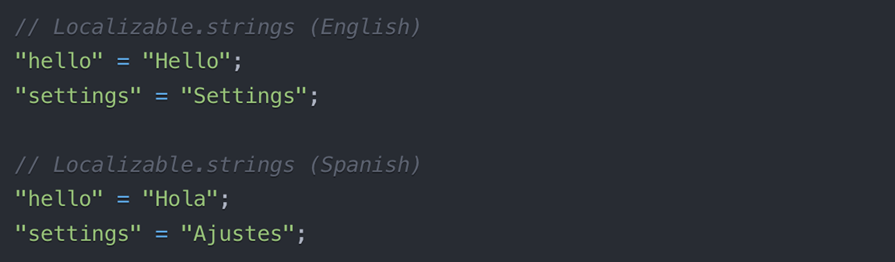
2. Create Localization Files
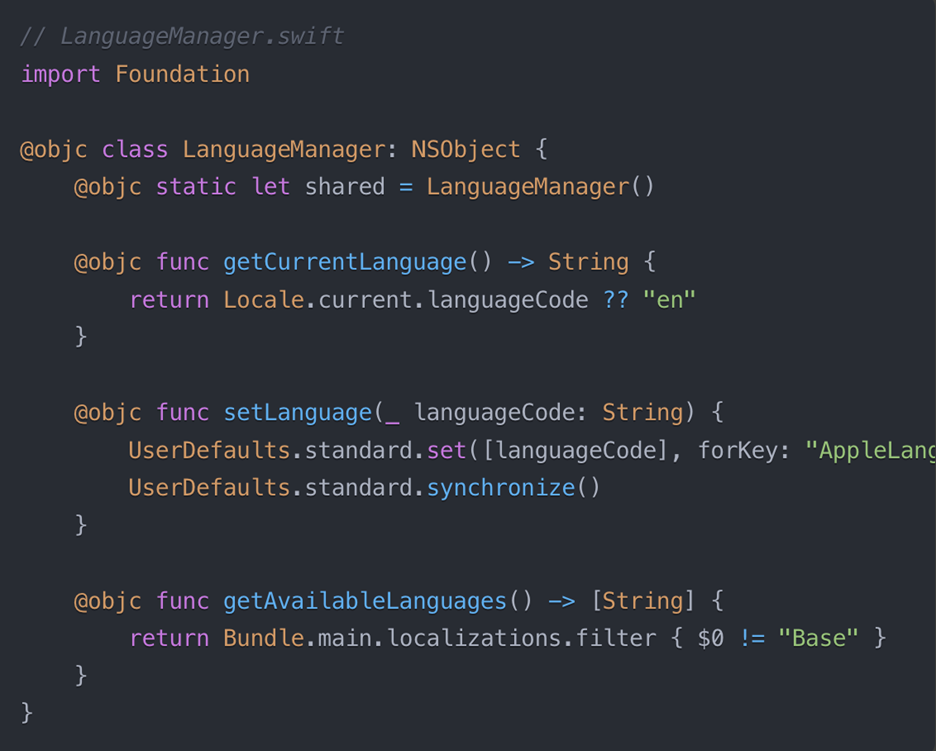
3. Create Localization Manager (Optional)
Android Native Setup
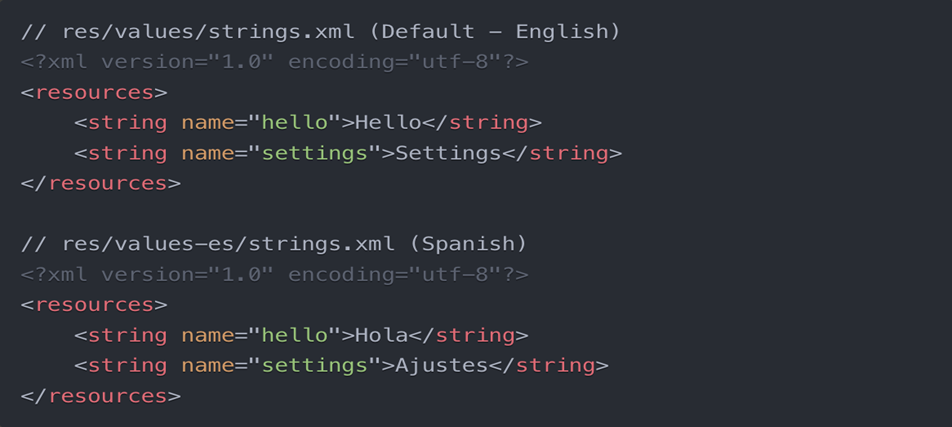
1. Create String Resources
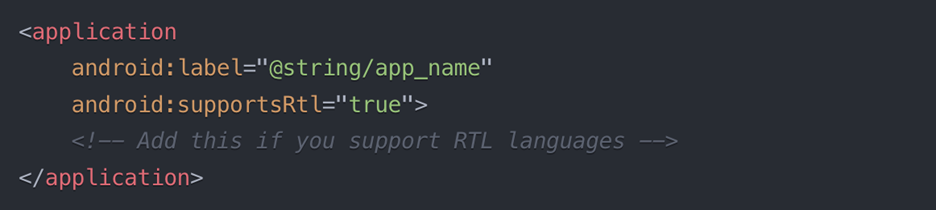
2. Update Android Manifest
Add supported locales in android/app/src/main/AndroidManifest.xml
3. Create Language Helper (Optional)
Code for Creating language helper:
// LanguageHelper.kt package com.yourapp

import android.content.Context import android.os.Build import java.util.*

class LanguageHelper { companion object { fun setLocale(context: Context, languageCode: String) { val locale = Locale(languageCode) Locale.setDefault(locale)

       val resources = context.resources
        val configuration = resources.configuration

        configuration.setLocale(locale)
        context.createConfigurationContext(configuration)
    }

    fun getCurrentLanguage(context: Context): String {
        return if (Build.VERSION.SDK_INT >= Build.VERSION_CODES.N) {
            context.resources.configuration.locales[0].language
        } else {
            context.resources.configuration.locale.language
        }
    }

    fun getAvailableLanguages(context: Context): List<String> {
        return context.assets.locales.toList()
    }
}
  }
Conclusion
Implementing internationalization and localization in your React Native app requires careful planning and attention to detail. By following these best practices and guidelines, you can create a truly global app that provides an excellent user experience across different languages and regions.
References:
i18n docs
i18n React Native package